Category Archives: News

ReconstructMe SDK 1.0 Released

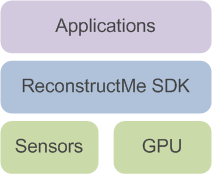
As of today ReconstructMe SDK 1.0 is available for commercial and non-commercial use. ReconstructMe SDK is designed for a broad band of applications. It targets simple real-time reconstruction applications and scales up to multiple sensor projects.

Design

We spent a lot of time in designing the API as we wanted it to be as easy-to-use as possible without limiting the possible flexibility. After dozens of approaches and evolutionary prototypes, we’ve settled with a design that we think accomplishes the following main goals

  • easy-to-use A generic and consistent API allows you grasp the concepts quickly and develop your first reconstruction application within minutes.
  • easy-to-integrate The API comes as a pure C-based implementation without additional compile time dependencies. Interopability with other programming languages  is easly possible.
  • high-performance The SDK is designed to provide a maximum performance for a smooth reconstruction experience.

Real-time 3D reconstruction is complex. We tried to hide as many details as possible about the process to allow you to concentrate on application programming.
Availability

The ReconstructMe SDK is available for non-commercial usage (with some limitations) and commercial usage. Both feature the same functionality, but the non-commercial version is limited in some aspects. See our project page for details. The package comes bundled with an installer that allows you to install the necessary sensor drivers on the fly (note that the drivers are not included, but downloaded remotely from our site).

ReconstructMe SDK is currently compiled for Windows 32bit using Visual Studio 10.

Interoperability

Getting reconstructme to work in other programming languages is easy. We added an example to demonstrate the case for C#. We’d like to add binding for all common languages, but obviously that is a task that requires the help of the community. If you’d like to contribute to a binding drop us a note in our development forum.

Example

Here’s a very first introductory example into the C-API copied from the reference documentation. The example shows how to perform real-time reconstruction using a single sensor. Besides, built-in real-time visualization and surface visualization is used. The final mesh is saved in PLY format.

Here’s the corresponding code

// Include the necessary headers
#include <reconstructmesdk/reme.h>
  // Create a new context
  reme_context_t c;
  reme_context_create(&c);

  // Compile for OpenCL device using defaults
  reme_context_compile(c);
  
  // Create a new volume
  reme_volume_t v;
  reme_volume_create(c, &v);
  
  // Create a new sensor. Tries multiple backends using default
  // sensor configurations, returns the first working one. By default 
  // each sensor works on the first volume created.
  reme_sensor_t s;
  reme_sensor_create(c, "openni;mskinect;file", true, &s);
  reme_sensor_open(c, s);

  // For debugging purposes open a viewer for tracking the reconstruction process.
  // This will create a two-sided viewer showing the video stream and the current
  // reconstruction from the sensor point of view.
  reme_viewer_t viewer;
  reme_viewer_create_image(c, "This is ReconstructMe SDK", &viewer);
  reme_viewer_add_image(c, viewer, s, REME_IMAGE_DEPTH);
  reme_viewer_add_image(c, viewer, s, REME_IMAGE_VOLUME);

  // Perform reconstruction until no more frames are left
  int time = 0;
  while (time < 200 && REME_SUCCESS(reme_sensor_grab(c, s))) {

    // Prepare image and depth data
    reme_sensor_prepare_images(c, s);

    // Try to determine updated sensor position.
    // On succes, update volume, otherwise move to a recovery position
    // and wait for the tracking to start again.
    if (REME_SUCCESS(reme_sensor_track_position(c, s))) {
      
      // Update volume with depth data from the 
      // current sensor perspective
      reme_sensor_update_volume(c, s);

    }

    // Update the viewer
    reme_viewer_update(c, viewer);
    time += 1;
  }

  // Close and destroy the sensor, it is not needed anymore
  reme_sensor_close(c, s);
  reme_sensor_destroy(c, &s);

  // Create a new surface
  reme_surface_t m;
  reme_surface_create(c, &m);
  reme_surface_generate(c, m, v);
  reme_surface_save_to_file(c, m, "test.ply");
  
  // Visualize resulting surface
  reme_viewer_t viewer_surface;
  reme_viewer_create_surface(c, m, "This is ReconstructMeSDK", &viewer_surface);
  reme_viewer_wait(c, viewer_surface);

  reme_surface_destroy(c, &m);

  // Make sure to release all memory acquired
  reme_context_destroy(&c);

  /** [Example Code] */

For more examples please visit the documentations’ example page.

Happy reconstruction!
The ReconstructMe Team.

The Hives at MakerBot

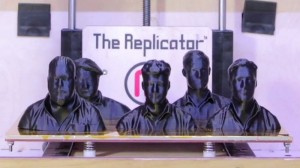
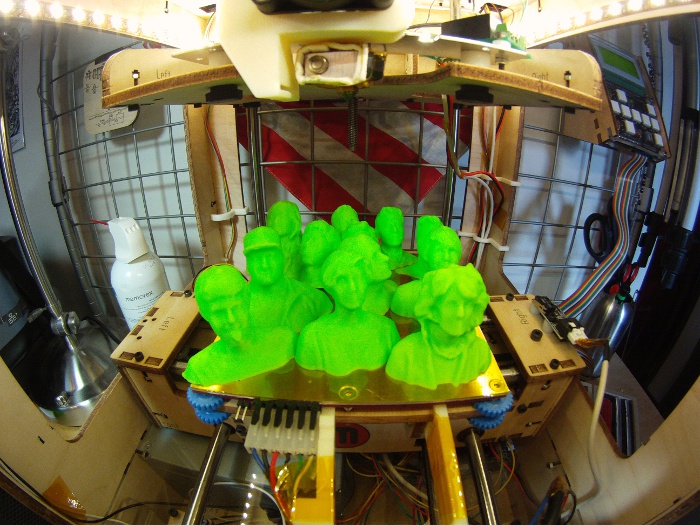
None other than the swedish rock band The Hives visited MakerBot where they got 3D reconstructed using ReconstructMe and 3D printed by the Replicator. There is a blog post on Thingsinverse where the models can be downloaded from.

Thanks to Baeble Music, there is also a video available. Enjoy :-)

ReconstructMe and ASUS at the Computer Graphics Workshop 2012 in Taipei

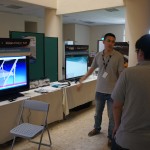
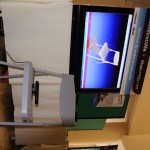
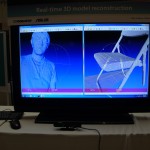
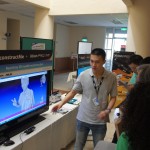
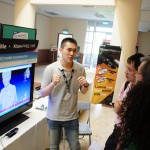
ASUS demonstrated ReconstructMe with their sensor Xtion Pro at the Computer Graphics Workshop 2012 helded by ACM SIGGRAPH in Taipei (2012/07/12 – 2012/07/13). Below, you can see some impressions of the workshop.

ReMe Demo Performed by ASUS

We have received a note from ASUS that ReconstructMe will be demonstrated live at the Computer Graphics Workshop 2012 held by ACM SIGGRAPH in Taipei (2012/07/12 – 2012/07/13).

ASUS will introduce ReMe at their booth. Picture and video footage will be uploaded when available.

Surface Reconstruction

While making some serious progress on texturing scanned surfaces, we ran into need of a more decent surface reconstruction and decimation technique. Until now, exported meshes contained hundreds of thousands of triangles, adding unnecessary overhead in regions that could be expressed with just a couple of triangles (e.g planar regions). Additionally, we felt the need of closing small surface holes in order to allow smooth texturing across the surface.

Therefore we re-designed our surface reconstruction pipeline to support more sophisticated reconstruction techniques and a configurable surface decimation pipeline.

Below is an image that shows the original mesh as generated by the current version of ReMe (v. 0.6.0-405). It contains roughly 250.000 faces and one can clearly spot the holes that remained due to the lack of visibility of these areas while scanning.

In contrast, the next image shows a successful reconstruction of the original surface reduced to 50.000 faces with boundary holes closed.

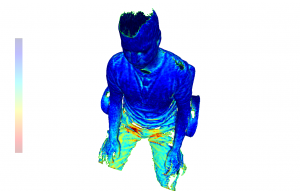
Comparing both meshes using the Hausdorff distance gives an average distance of 0.8 mm. The image below colorizes the distances (blue low, red high).


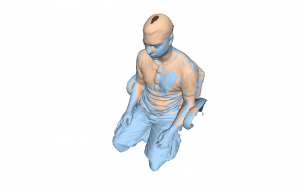
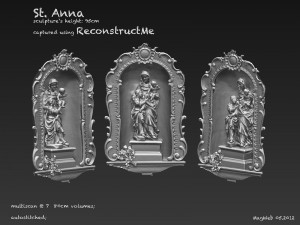
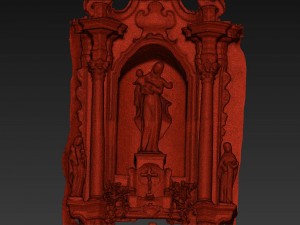
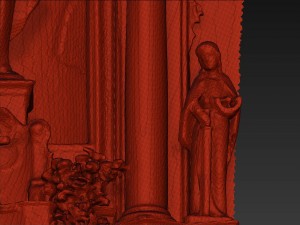
Surface reconstruction isn’t limited to individual meshes, but can also be used to fusion multiple volumes into one single consistent mesh. The image below shows two individual stitched meshes using ReMe’s --multiscan feature.

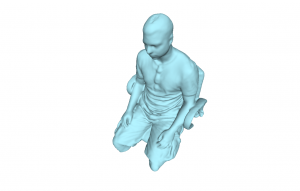
Here is the fusioned mesh as generated by the development version of ReMe

Stay tuned!

On Making Things Matter

Taken straight from Thingiverse

Mike Moceri and Tom Burtonwood collaborated on a project that premiered May 26th at The Southside Hub of Production for the exhibition “On Making Things Matter”. We 3d scanned (with the Kinect, Reconstructme + Netfabb) visitors at the opening reception and then 3d Printed them with a MakerBot Thing-O-Matic. All the “portraits” we scanned are uploaded to Thingiverse to share with teh internets. We have also scanned portions of the exhibition and the interior of the building and we will be installing 3d prints of these vignettes over the course of the exhibition.

Here’s a video (you can see ReMe in action at the beginning of the video)

Mike attended the Zhou B. Art Center in Chicago participating in an event called Facemask. More on this including a video stream can be found here.

Launch of Commercial Version

We have just launched our commercial version which can be used for applications where monetary remuneration takes place. Commercial licenses are available at our web shop.

Please consider to support us!

Additionally we’ve updated ReconstructMe to 0.6.0-405. Here’s the changelog

  • Added support for Microsoft Kinect 1.5 runtime.
  • Fixed issue on i5 CPUs when saving or displaying mesh.
  • Removed ‘r’ key from multiscan.
  • Added installer.

Tech Preview – Surface Texturing

Thanks to all that contributed in our feature survey on Google+. We adapted our internal road-map due to it’s results and will head for texture support and an easy to use graphical user interface next.

Even though it’s still early days, we’d like to share what can be accomplished using our texturing engine. We are aiming at a semi-automatic solution where users are attaching textures through a post-processing step. This allows us to use arbitrary cameras for texturing the mesh. Our engine supports multiple textures and combines them smoothly.

The first image below shows the plain surface reconstructed in high resolution mode. Next to it an image taken with an Casio Exilim ZR 100 to be used as texture. On the right the final textured mesh is shown.

The best part about it, it took less than 3 minutes from scanning to texturing for the above scenario. We will probably release this feature alongside with the first version of the UI around late summer.

Enjoy!

PEZ Army

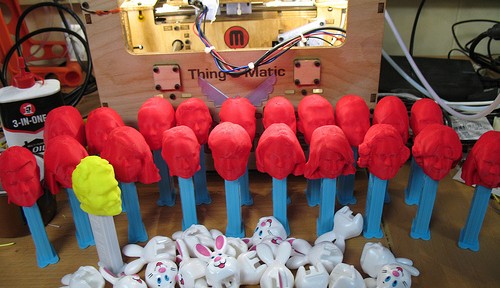
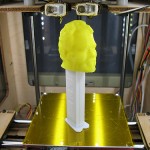
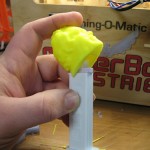
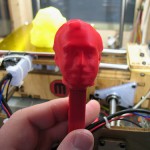
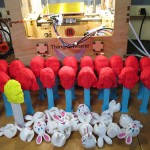
This is worth sharing! Tony has gathered a lot of experience in generating customized PEZ dispensers. It all started with a single dispenser for his own use and he ended up producing 92 PEZ heads till this day. A chronology in pictures.

More information on his photostream.

Creative Commons License
Images are licensed under a Creative Commons Attribution-ShareAlike 3.0 Unported License.

Press Release – ReconstructMe Automatica 2012

This is a press release in German language.

Vom Kinderzimmer in die Produktion: ReconstructMe modelliert in Echtzeit

MÜNCHEN / STEYR. „Next Level“ – Fabrikshalle: Wenn die Softwareingenieure von PROFACTOR die Kamera „Kinect“ der Microsoft Spielkonsole Xbox 360 in die Hand nehmen, haben sie keinen neuen Punkterekord im Auge. Das „Spiel“ beim österreichischen Forschungsunternehmen heißt ReconstructMe und zielt auf Anwendungen in der Industrie ab: „Augen“ für den Roboter und das blitzschnelle Erstellen von CAD-Modellen oder Arbeitsumgebungen werden damit Realität.

Die Kamera „Kinect“ der Spielkonsole Xbox 360 ist in der Lage, Bewegungen von Spielern vor dem Fernseher zu detektieren. PROFACTOR nutzt das System zur 3D-Objekterkennung.

Dazu wurde von PROFACTOR Software-Ingenieuren ein neuer Algorithmus implementiert. Er ermöglicht den Einsatz der Kamera als Scanner. Dieser beschränkt sich nicht auf die Aufnahme von Bildern, sondern erkennt Objekte – und das in Echtzeit. Möglich ist das durch die Verknüpfung der von der Kamera aufgenommenen Bilder mit dem Bewegungspfad der Kamera.

Das exakte Modell eines beliebigen Gegenstandes oder einer Arbeitsumgebung erfolgt in Sekundenschnelle. Derzeit lotet PROFACTOR aus, wie das System in der industriellen Praxis eingesetzt werden kann.

ReconstructMe – Einsatzmöglichkeiten

  • Assistenzrobotik: Roboter, die mit dem Menschen auf engem Raum kooperieren, benötigen alleine aus Gründen der Sicherheit einen „Sehsinn“, um Bewegungen in Echtzeit planen zu können und Kollisionen zu vermeiden.
  • CAD-Modellierung: Auch die Rekonstruktion von Werkstücken, von denen kein CAD-Modell vorliegt, ist möglich. ReconstructMe kann diese Daten schnell und einfach erheben.
  • Vermessen von Werkstücken vor der Bearbeitung im Produktionsprozess.
  • Griff in die Kiste: ReconstructMe könnte auch den von PROFACTOR entwickelten iRobFeeder beim Detektieren und Handling unsortiert dargebotener Werkstücke unterstützten.
  • Ambient Assisted Living: Beim Projekt zur Entwicklung eines „intelligenten Rollstuhls“ (RHADAR) bietet sich ReconstructMe als Navigationshilfe durch die Wohnung an.

PROFACTOR auf der Automatica in München: Halle B2 Stand 229