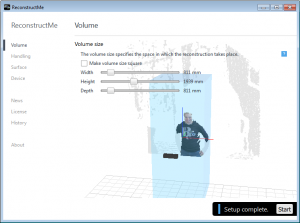
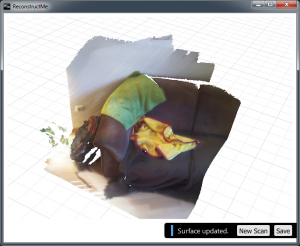
the waiting is over. We have now officially released ReconstructMe 2.0 for Windows. ReconstructMe now features a brand new slick UI design and brings support for colorizing your scans. The new UI allows you to create your setup more easily. Background helpers automatically choose the best settings for your scanning task. A simplification module optimizes your surface for less memory consumption while maintaining its appearance.
 From our dear beta users we know that ReconstructMe 2.0 offers better performance, works across a wide range of GPUs/CPUs and generates higher quality scans.
This is only the beginning of a huge adventure for all of us. Many features are about to come to ReconstructMe 2.0 such as texturing from photos, cleaning and completing meshes as well as mobile support. One experimental feature is already included in the current release, albeit a bit hidden, and waits for you to discover it. We are giving away one free PRO license for the first explorer who unveils it. Hint: we are using the feature in our demo video below.
The following video quickly introduces ReconstructMe 2.0 and shows how easy it is to generate colorized 3d scans.
You can download ReconstructMe 2.0 from our Get Started Now! page.
Capture your moment in 3D with ReconstructMe.
Best regards,
The ReconstructMe Team


Awesome, thanks! I’ve been more than excited to test this release. Wohoooo!
Cheers,
Peter
You’re welcome! Let us know how it works out.
Best,
Christoph
Color jeej! And such a smooth scanning experience. Nice job, ReconstructMe! Does it export UV texture Maps?
Hi Mark,
working on it. Currently it colorizes vertices. Wait for the next release though :)
Muchas gracias por la mejora, estoy deseando probarlo en casa…
Have fun trying it out at home! Hope you love the results.
Best,
Christoph
Absolutely amazing piece of software. Just ran it, nice results. Now searching for the hidden feature. Hopefully I can find ;) More hints?
Markus & Emelly
No more hints :) Watch the video carefully. It’s really a feature that makes your life easier.
Haven’t had a chance to try this out yet (at work currently), but I’m definitely looking forward to downloading when I get home later this evening! As always, incredible job – making what could be a long and exhausting scanning process as simple as sweeping the Kinect over a model for high quality results!
By the way, trying to find that hidden feature in the demo video. The first thing that came to mind was the ability to have timed scans – so you no longer have to point your Kinect away to suddenly freeze it or hit a key on the keyboard. Not sure I noticed this in previous releases, but either way, I can tell it’ll be a very convenient feature!!
(The only other thing I could think of was being able to manually define the size of the scanning area, but I’m pretty sure that’s been available nearly since day one if I recall correctly). Ooooh, what could it be!? ;)
Hi Jon,
thanks for the feedback. And as far as your thinking is concerned you are heading in the right direction! The feature isn’t that obvious though, its hidden and can only be enabled via some tricks (like an easteregg). You’ll love the feature once you know it, as it just does what seems to be natural :)
Happy searching,
— Christoph
great update. cool to see how every new version expands possibilities und workflow.
now my bid for the hidden feature: preview of the scene within the bounding box setup?
Hi Gerald, great guess, but nope :) The feature is not visible in the UI, you cannot yet activate or deactivated it via UI controls (yet), but it can be enabled somewhere (a place where settings live). Once you found it, you need to activate it, finally find out how to use it. Then you’ll love it :)
Best,
Christoph
Christoph, do you mean placeVolumeOnFloor setting? ;)
hot track, hot track! Did you find out how to use it and what it does? If so, we’ve a winner :)
Julia, please contact us at info@reconstructme.net. Although you haven’t written about how to use the feature you are pretty close and we’d like to reward you with a booby price.
Best,
Christoph
Thank you very-very much!
You are welcome!
Is the new hidden feature Auto-Exposure. I see that your images get automatically adjusted to correct exposure.
Hi Güray, nope that’s not the feature. Actually we’d like to lock the exposure for the Kinect, but that’s a bit of a different story. How do you like the new version?
The new version looks very promising. I’m really wondering/waiting for the texture support.
Will it be possible to use an external camera to capture a texture (probably a calibration step before that) and a post process to combine with model ? or Are you simply using Kinect’s rgb data?
Really liked the new UI. Although arrow keys work to toggle the menu selection, no other key works to enter that menu item. I suggest, arrow up-down to navigate menu items (they do it now) and arrow right to enter that menu and once in the menu we should be able to navigate and activate items just with arrows and space key.
Anyway, congratulations with the new version.
Thanks Güray,
yes that’s our plan. Texture with a HD camera. Maybe not in the first texture release, but its a prototype that we already have ready. The thing is this: we’d like to strip down the complexity of the process to a minimum and this requires the most thinking and the most intelligent algorithms. Its not the texturing itself, its about making it work for everyone.
I found the hidden feature. It’s the place volume on floor thing.
In the folder “My Documents/My ReconstructMe/Settings” in the “CurrentSettings.ini” set:
placeVolumeOnFloor=true
Then when scanning you spot the floor which looks like you put the floor about the middle of frame about 45deg or so. Not sure if this 45deg thing is needed but that’s what was repeated in both clips in the video. Tried it out on some a few things and seems to work.
Anyone beat me to it?
Tadaaaaa! We’ve a winner. placeVolumeOnFloor will be part of the next official release and it allows you to pin the volume on the floor. Basically what you do is the following.
– turn the feature on
– when the reconstruction starts, point the sensor on the floor where you’d like to have the center of the origin
– hold the sensor without much roll
– wait for the reconstruction to start
– the volume will be aligned with the floor, meaning that the reconstruction takes place in a natural space. No need for rotating your model afterwards as the axis will be aligned naturally.
Best,
Christoph
Please prepare for new release which support new Kinect sensor. The new kinect sensor is the ones sold with Xbox one. it has better resolution and spec. I hope reconstuc me can improve a lot with this new hardware.
and also great if Reconstructme can make 3D model for animation. so we can scan and create model from human, with movement. hand, leg, head, body and others. Other ideas later
Dear Sirs,
I am very interested in your software.Is it possible to use it to capture architectural details?If so I would be willing to purchase a commercial license.